Let’s cut straight to the uncomfortable truth that most “budget soundproofing” guides won’t tell you: egg cartons don’t work. Hanging blankets on walls don’t work — not meaningfully. Stacking pillows in corners won’t fix your reverb problem. These are the internet’s most-shared acoustic tips, and they’ve sent thousands of podcasters down a path of wasted weekends and embarrassing recordings.
Soundproofing a podcast studio on a budget is genuinely possible. But it requires understanding what you’re actually trying to solve — because “soundproofing” and “acoustic treatment” are two different problems, budget or not, and most guides treat them as one.
Get this distinction wrong and you’ll spend money on the wrong things, record in a room that still sounds hollow and distant, and wonder why your audio never quite matches the podcasts you’re trying to compete with.
Two Problems, One Room — Understanding the Difference First
Soundproofing keeps sound from entering or leaving your recording space. It’s about mass, seals, and isolation. Think traffic noise bleeding in through your window, or your voice carrying through to the next room.
Acoustic treatment controls how sound behaves inside the room. It manages echo, flutter, reverb, and the frequency balance of your recordings. A room can be completely isolated from outside noise and still sound terrible on a microphone because of how the internal surfaces interact with sound waves.
For a podcast studio, acoustic treatment almost always matters more than soundproofing — unless you’re recording in genuinely noisy conditions. A voice recorded in a well-treated quiet room sounds vastly better than a voice recorded in a soundproofed but untreated one. This matters for budget planning because acoustic treatment is substantially cheaper to achieve than structural soundproofing.
Start with treatment. Layer in soundproofing only where you actually need it.
The Cheapest Thing That Makes the Biggest Difference
Room selection. It costs nothing and affects everything.
If you have a choice of rooms, pick the smallest one with the most soft furnishings already in it. Walk-in wardrobes are legitimately excellent recording spaces — clothes act as broadband absorbers, the small volume reduces flutter echo, and wardrobes are typically interior rooms away from external noise. Some of the cleanest-sounding podcast recordings ever made have come out of someone’s closet. No shame in that. It’s physics.
Avoid rooms with bare parallel walls, hard floors, and high ceilings. A square room is the worst possible shape acoustically because it creates standing waves — resonant frequencies where bass builds up and the room’s own character starts colouring your voice in ways no post-processing can fully fix.
If you can’t control the room shape, you can control where in the room you record. Set up in a corner rather than the centre. Position your microphone so it’s pointing away from the hardest wall. Small positional changes shift the acoustic character of your recording dramatically without spending a single dirham.
Budget Acoustic Treatment That Actually Performs
Once you’ve chosen your room, the priority is controlling first reflections — the sound waves that bounce off nearby surfaces and arrive at your microphone milliseconds after the direct sound. First reflections are what makes recordings sound roomy, distant, or echoey. Eliminate them and the recording tightens up immediately.
Acoustic foam panels — the pyramid or wedge-cut variety — are the entry-level solution. They’re widely available in the UAE, they’re genuinely effective at mid and high frequency absorption, and a basic set of 12 to 16 panels covering roughly 2 square meters can be sourced for AED 150 to 300 depending on density and thickness. Mount them at ear height on the walls to your left, right, and behind the microphone. That’s the reflection triangle that matters most.
What acoustic foam doesn’t do well is absorb low frequencies. Bass builds up in corners and room boundaries, and if your voice has substantial low-end content — or if you’re recording any music, instruments, or effects — you’ll hear the room’s bass character in your recordings as a kind of muddy, boxy quality. This is where bass traps come in.
Corner bass traps don’t need to be expensive to be effective. Thick acoustic foam wedged tightly into the floor-to-ceiling corners of your room handles the low-end accumulation that standard panels ignore. A set of four corner bass traps — one per corner — makes an audible difference in bass clarity that cheaper workarounds can’t replicate. Budget-wise in the UAE, expect AED 400 to 800 for a decent functional set. It’s not glamorous. The results are.
The DIY Options That Are Worth Your Time (And the Ones That Aren’t)
Acoustic panels can be made rather than bought, and for large wall coverage, DIY is genuinely cost-effective. The construction is simple: a timber frame, mineral wool or rigid fiberglass insulation batt as the absorptive core, stretched fabric on the face. The key is the core material — this is not a place to substitute. Mineral wool like Rockwool 60 or Rockwool 80 (widely available through building materials suppliers in the UAE) has the absorption coefficients that actually work. Generic foam mattress toppers, carpet offcuts, and packing foam do not.
A 600mm x 1200mm DIY panel built to proper spec using Rockwool 60 will cost approximately AED 80 to 120 in materials. The same size panel bought from an acoustic supplier runs AED 200 to 350. For a room needing 8 to 10 panels, that’s a meaningful saving.
What isn’t worth your time is the egg carton experiment (surface area is too small, material has no meaningful absorption), the hanging blanket approach (moving air, not treating absorption), or stacking bookshelves with books (diffusion, not absorption — useful but not what most home podcast setups need first).
A moving blanket draped over a mic stand to create a reflection shield? Actually useful as a temporary measure. Cheap, portable, handles the most critical reflection zone directly behind the microphone. Don’t build a career on it, but as a starter solution before proper panels go up, it works better than people admit.
Dealing With External Noise Without Structural Work
This is where budget limitations bite hardest. Structural soundproofing — decoupled walls, floating floors, mass-loaded barriers — is expensive because physics doesn’t offer cheap shortcuts. Mass stops sound. More mass, more isolation. That costs money.
But there are practical budget interventions that address the most common external noise problems without structural work.
Door gaps are responsible for more noise bleed than most people realise. A standard interior door with a centimeter gap at the bottom is acoustically equivalent to a hole in the wall. Self-adhesive door seals and a basic door sweep — available at any hardware store in the UAE for under AED 100 total — close that gap and make a measurable difference in isolation. It’s one of the highest-ROI acoustic purchases on this entire list.
Windows are the other major weak point. If you’re recording in a room with a single-pane window facing a noisy street or a busy building, heavy mass-loaded vinyl sheeting over the window opening (removable, no damage to the frame) adds significant blocking mass for AED 150 to 250 depending on window size. It’s not a permanent solution and it blocks your view entirely, but for serious recording sessions it works.
Recording during quieter periods — early morning, late evening, during Dubai’s Ramadan daytime hours when traffic genuinely drops — is free, underrated, and something professional audio engineers have always done when working in non-ideal environments.
When Budget Treatment Stops Being Enough
There’s a ceiling to what budget DIY can achieve, and it’s worth knowing where that ceiling sits before frustration sets in.
If you’re recording in a room directly below neighbours with children, next to a major road, or inside a building with significant HVAC noise through the vents — panels and door seals won’t get you to professional-grade isolation. The physics of the problem requires structural mass and decoupling that DIY solutions can’t provide.
According to research published in the Journal of the Audio Engineering Society, effective low-frequency isolation below 100Hz typically requires wall constructions with surface mass above 50kg per square metre — that’s not acoustic foam territory. That’s double-leaf construction, resilient clips, and mass-loaded membranes.
At this level, the budget conversation shifts. A professionally designed and installed podcast studio with proper isolation, treated walls, bass trapping, and climate-controlled environment starts at figures that feel significant upfront but are measurably cheaper than the cumulative cost of years of unusable recordings, expensive retakes, and post-production noise reduction that never fully resolves source problems.
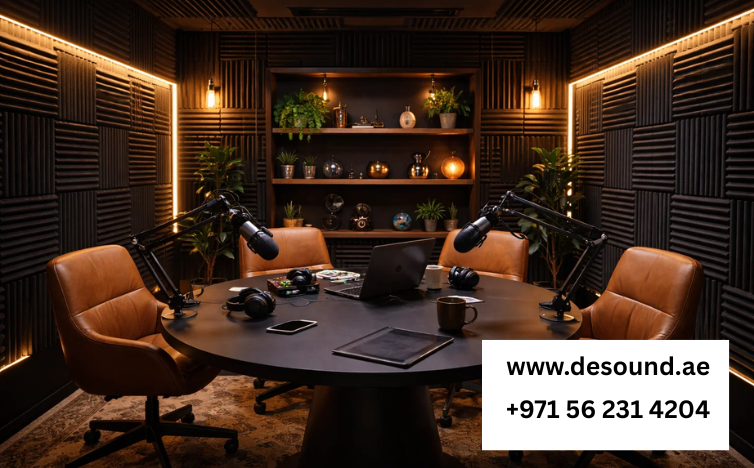
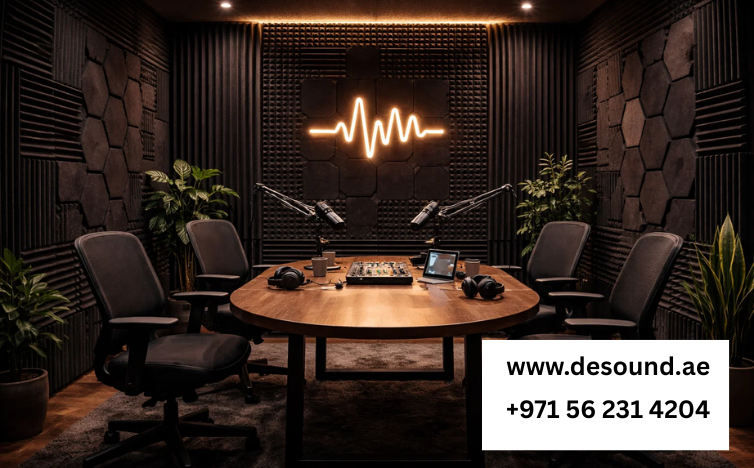
De Sound’s podcast studio soundproofing services in the UAE are specifically designed for this tier — where the recording ambition has outgrown what a few panels and a blanket can deliver. An acoustically engineered studio built to broadcast specifications sounds fundamentally different from a treated bedroom, and for anyone monetising their podcast seriously, that difference shows up in listener retention and brand perception.
Call us: Contact DeSound Soundproofing Expert in Dubai For Soundproofing: +971 56 231 4204
The Honest Budget Breakdown
For a basic home podcast setup in a reasonably quiet room, here’s what a realistic treatment budget looks like in the UAE:
Acoustic foam panels for primary reflection points — AED 200 to 350. Corner bass traps — AED 400 to 700. Door seals and sweep — AED 80 to 120. DIY panel materials for additional wall coverage — AED 300 to 500. Total: AED 980 to 1,670 for a setup that genuinely improves your recordings.
That’s a real budget with real results. Not a professional studio. But a treated room that a condenser microphone can work in without the recording betraying its origins.
Everything beyond that — proper isolation, low-frequency management, climate control, professional-grade vocal booths — is a conversation about building something that serves the work at a level the work deserves. If podcasting is a serious business or a growing one, that conversation is worth having sooner rather than after you’ve spent two years recording in a space that was never built for it.