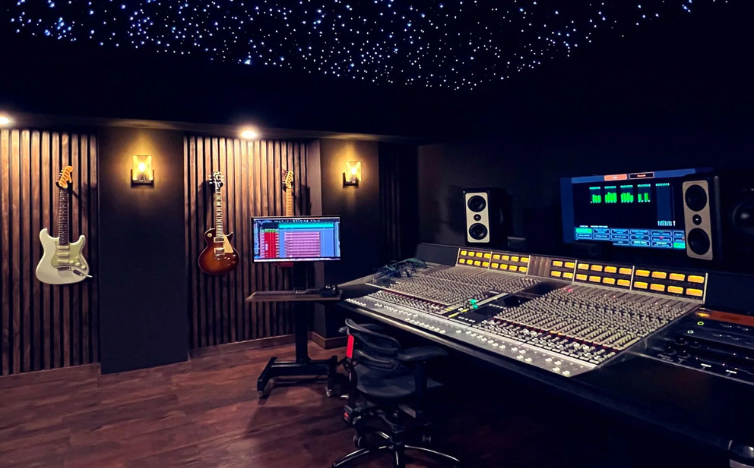
Setting up an acoustic recording studio can make a huge difference in the quality of your recordings. Proper soundproofing and acoustics help eliminate unwanted noise, making your tracks clear and professional. This guide will take you through each step needed to create the perfect recording environment.
1. Choose the Right Room for Your Studio
The first step in creating an acoustic recording studio is selecting the right space. Ideally, choose a room with the following characteristics:
- Size: A medium-sized room is best—too small can lead to sound reflections, while too large can be challenging to control.
- Shape: Avoid square rooms as they tend to have more acoustic issues. Look for a rectangular room with asymmetrical walls if possible.
- Location: A space away from noisy areas like streets or neighbors will help minimize external sound interference.
2. Soundproof the Room
Soundproofing is crucial to block external noise and contain your audio. Follow these tips for effective soundproofing:

- Seal Doors and Windows: Use weather stripping around doors and windows to block gaps. Consider installing heavy, solid-core doors for better sound isolation.
- Use Acoustic Curtains: Heavy, thick curtains over windows can help absorb sound.
- Add Mass: Install mass-loaded vinyl (MLV) on walls and floors to reduce noise transmission.
- Decouple Surfaces: Use resilient channels and sound isolation clips to prevent vibrations from traveling through walls.
3. Optimize Acoustics with Acoustic Panels
To ensure clear sound quality, you’ll need to manage the room’s acoustics:
- Install Acoustic Panels: Place panels on walls to absorb mid to high frequencies. Focus on the first reflection points, which are usually where the sound bounces off the walls before reaching your ears.
- Use Bass Traps: Install bass traps in the corners of the room to manage low frequencies.
- Diffusers: Place diffusers on the back wall to scatter sound evenly and prevent echoes.
See Also: The Importance of Acoustic Treatment in Recording Studios
4. Position Your Recording Equipment Properly
The placement of your equipment can significantly impact your recording quality:
- Recording Desk: Position your desk and main equipment at the center of the wall, facing the length of the room.
- Monitor Speakers: Place speakers at ear level and create an equilateral triangle between you and the speakers to ensure accurate sound.
- Microphone Position: Use a microphone stand with a shock mount to reduce vibrations. Place the mic in the center of the room to avoid unwanted reflections.
5. Consider Flooring and Ceiling Treatments
Flooring and ceilings also play a key role in a studio’s sound:
- Carpet or Rugs: Use thick rugs on the floor to absorb sound and reduce reflections. Carpeted floors can help with sound absorption, but avoid wall-to-wall carpeting if possible.
- Ceiling Clouds: Install acoustic panels on the ceiling, also known as ceiling clouds, to minimize reflections from above.
6. Set Up a Dedicated Control Room (Optional)
If space allows, consider setting up a separate control room:
- Isolation: Use a soundproof partition to separate the control room from the recording area.
- Equipment: Place your audio interface, computer, and mixing desk in the control room to maintain a clean recording environment.
- Visibility: Install a double-glazed soundproof window for visual contact between the recording and control rooms.
7. Choose the Right Furniture and Décor
The furniture you choose can impact acoustics:
- Minimalistic Furniture: Use minimal furniture to reduce reflections. Choose fabric-covered furniture that absorbs sound.
- Bookshelves: A bookshelf filled with books can serve as a natural diffuser.
- Avoid Glass and Metal: Steer clear of glass and metal surfaces, as they reflect sound. Opt for wooden furniture whenever possible.
8. Test and Adjust the Room Acoustics
Once your setup is complete, test your room acoustics:
- Use Test Tracks: Play a variety of music and sounds to identify any acoustic issues.
- Make Adjustments: Move panels, speakers, or furniture to fine-tune the acoustics.
- Listen Critically: Use your own recordings to ensure the sound quality meets your expectations.
9. Regularly Maintain and Upgrade Your Setup
To keep your studio in top shape:
- Inspect Soundproofing: Check for any gaps or leaks in the soundproofing and fix them promptly.
- Upgrade Equipment: As technology advances, invest in better recording equipment and acoustic treatments.
- Maintain Cleanliness: Keep your studio clean and organized for the best workflow and sound quality.
Call us: Contact DeSound Soundproofing Expert in Dubai For Soundproofing: +971 56 231 4204
By following these steps, you can set up an acoustic recording studio that delivers professional-quality sound. Proper planning, soundproofing, and acoustic treatment are essential for getting the best results in your recordings.

